
Powder quality often changes before a ribbon blender fails visibly: a worn flight, rising motor current, retained material or a leaking shaft seal can alter uniformity and contaminate the next batch. By following a fixed inspection order, trending mechanical condition and verifying cleaning and discharge performance, you can find these faults before they reach finished product.
Key takeaways
- Start with the batch record, machine status and fill level.
- Inspect ribbons, welds and clearances before charging powder.
- Trend drive, gearbox, bearing and coupling readings against baseline values.
- Release the blender only after post-maintenance checks pass.
Use a fixed pre-run inspection order before charging powder
Start with the batch record and machine status, not the motor. These ribbon blenders maintenance checks for powder quality prevent a dosing error or wrong fill level from being blamed on the mixer.
1. Confirm the product, batch number, recipe, ingredient masses, and validated fill range. Compare batch mass and measured bulk density with the blender’s working volume; many designs run at roughly 30–70%, not at gross shell capacity. Check calibrated scales, load cells, feeder cut-off, and recorded additions.
2. Isolate the blender, remove the covers, and inspect the trough, end plates, inner and outer ribbons, paddles, shaft, welds, and shell clearance. Look for powder buildup, rubbing marks, bent flights, cracked welds, loose fasteners, and shaft runout. Use the OEM clearance limit.
3. Check the gearbox oil level, leaks, coupling, motor, bearings, and guards. Rotate as specified, then run empty while checking direction, current, bearing temperature, vibration, and unusual noise against the baseline.
4. Operate the discharge gate and inspect shaft seals for leakage. Remove retained powder from the gate, outlet, seals, and dead pockets before charging.
5. After any product-contact repair, cleaning, or lubrication, document a tool-free inspection for weld debris, lubricant, loose fasteners, and metal fragments. Verify guards, interlocks, gate operation, seal leakage, rotation direction, noise, and vibration before release. Ribbon blenders require this fixed order because a no-load rotation check alone cannot confirm powder quality.
Inspect ribbons, welds and clearances for early mechanical defects
Lock out the blender, remove powder buildup, and rotate the shaft by hand before relying on a visual check. Caked material can hide a cracked weld, while a seized or stiff rotation points to contact, bearing trouble, or a bent component.
1. Inspect the inner and outer ribbon edges, flights, paddles, support arms, shaft welds and end plates under bright light. Look for a thinned or sharpened wear edge, missing metal, distortion, loose fasteners and hairline cracks. Clean a suspect weld and use dye penetrant testing if visual inspection cannot confirm it.
2. Measure ribbon-to-shell and ribbon-to-end-plate clearances at several shaft positions with feeler gauges. Compare every reading with the equipment manufacturer’s specification, not a plant-wide limit. An increased gap leaves stagnant pockets; a tight gap risks metal contact, torque spikes and contamination.
3. Check for a bent flight by comparing its position with the shaft along the full length. A flight that changes pitch, sits closer to one side, or leaves a polished arc on the shell needs investigation before charging powder.
4. Mount a dial indicator on the shaft and rotate it slowly to measure runout at the drive end, centre and discharge end. Record the readings against the manufacturer’s limit, especially after ribbon, bearing, gearbox or seal work.
5. Search the shell, ribbon edges and end plates for bright rubbing marks, metallic dust, scoring or fresh impact marks. Check coupling alignment and looseness if contact appears intermittent.
Record photographs and measurements in your ribbon blender maintenance log. Catching these defects early prevents ribbon blender powder problems such as extended blend time, poor uniformity and metal contamination.
Trend the drive, gearbox, bearings and coupling against a baseline
Trend each batch against a known-good baseline before a mechanical fault changes blend time or powder uniformity. Record motor current, gearbox temperature, bearing temperature, vibration, ribbon speed, batch mass and cycle time under the same recipe and fill condition. A gradual rise matters more than one isolated reading.
Use these checks during ribbon blender maintenance:
- Rising motor current can indicate powder buildup, an overloaded batch, ribbon interference, bearing drag or a partly blocked discharge.
- Increasing gearbox or bearing temperature points to low oil, leakage, lubricant failure, overload or deteriorating components. Check the oil level and inspect for fresh leaks.
- Increasing vibration or a new tonal noise points to looseness, imbalance, shaft runout, bearing damage or coupling misalignment.
- A longer cycle at unchanged speed and recipe can expose restricted powder movement, rubbing or drive deterioration before a laboratory result fails.
- After ribbon, bearing, gearbox or seal work, check shaft alignment, coupling bolts and flexible-element condition. Misalignment can reduce clearance on one side and create intermittent rubbing.
| Signal | What the trend can indicate | Immediate check |
|---|---|---|
| Motor current | Drag, overload or interference | Load, buildup, ribbons and discharge |
| Gearbox temperature | Oil loss, overload or gear wear | Oil level, leaks and temperature rise |
| Vibration | Misalignment, looseness or bearing damage | Coupling, mounts, shaft and bearings |
| Cycle time | Mechanical resistance or restricted discharge | Endpoint, gate and actual fill |
Treat speed and cycle time as validated process variables, not universal industrial blender care settings. Any motor, VFD, gearbox, ribbon or batch-size change requires confirmation that the approved blend endpoint still holds.
Verify the discharge gate, shaft seals and changeover condition
A discharge gate that stops short leaves a heel of powder in the trough. That retained material contaminates the next batch and can make the first and last discharge portions differ from the middle. Confirm the gate:
- Travels fully open and fully closed without binding.
- Closes against an intact seal, with no powder escaping around the perimeter.
- Leaves no product packed beneath the gate, in its pocket or at the trough outlet.
- Opens far enough to prevent a restricted stream and delayed emptying.
A leaking gate creates two failures: product loss during discharge and a path for moisture or foreign material to enter while the blender is idle. Record any incomplete travel, damaged seal, powder trail or buildup before releasing the equipment.
Inspect both shaft seals for powder leakage, worn seal faces, hardened packing, abnormal temperature and loss of the specified air purge. Powder entering the bearings shortens bearing life; lubricant or wash water moving inward changes powder quality and can create an unseen contamination source.
Changeover is not complete when the shell looks empty. Check the trough bottom, end plates, discharge pocket, shaft seals and gate recess under the approved cleaning method, then confirm the next batch’s ingredient additions, scales, load cells and feeder cut-off are calibrated and repeatable.
A retained heel can mimic ribbon blender powder problems, while an incorrect ingredient mass can create the same result. These are essential ribbon blenders maintenance checks for powder quality.
Set post-maintenance release checks and decide when specialist support is needed
Release the blender only after a documented post-maintenance check proves that mechanical safety, cleanliness and process settings remain intact. A no-load rotation test alone can miss a failed interlock, leaking seal or lubricant left on a product-contact surface.
- Refit every guard and test each access-door and discharge-gate interlock; confirm the shaft rotates in the specified direction.
- Operate the gate through its full stroke and check that it closes without binding or leaving a powder trap.
- Run the empty blender and record abnormal noise, vibration, motor current, bearing temperature and seal leakage against the normal baseline.
- After work inside the trough, inspect product-contact surfaces with a light for tools, weld debris, lubricant and loose fasteners; record the inspector, date and result.
- After cleaning, confirm the approved water, detergent, pressure and temperature were used, then verify that the trough, seals and bearing areas are dry before lubrication and release.
- Recheck the OEM ribbon-to-shell clearance and compare batch mass and bulk density with the validated working-fill range, not the shell’s gross volume.
- Confirm the approved ribbon speed, blend time and endpoint still apply after changes to the gearbox, motor, VFD, ribbon geometry or batch size.
Stop production and involve the manufacturer when clearance is unknown, a ribbon touched the shell, shaft runout changed, a weld or product-contact surface is damaged, vibration persists, or a safety interlock fails. For allergen, potent-product or microbial controls, obtain risk-based cleaning verification before release.
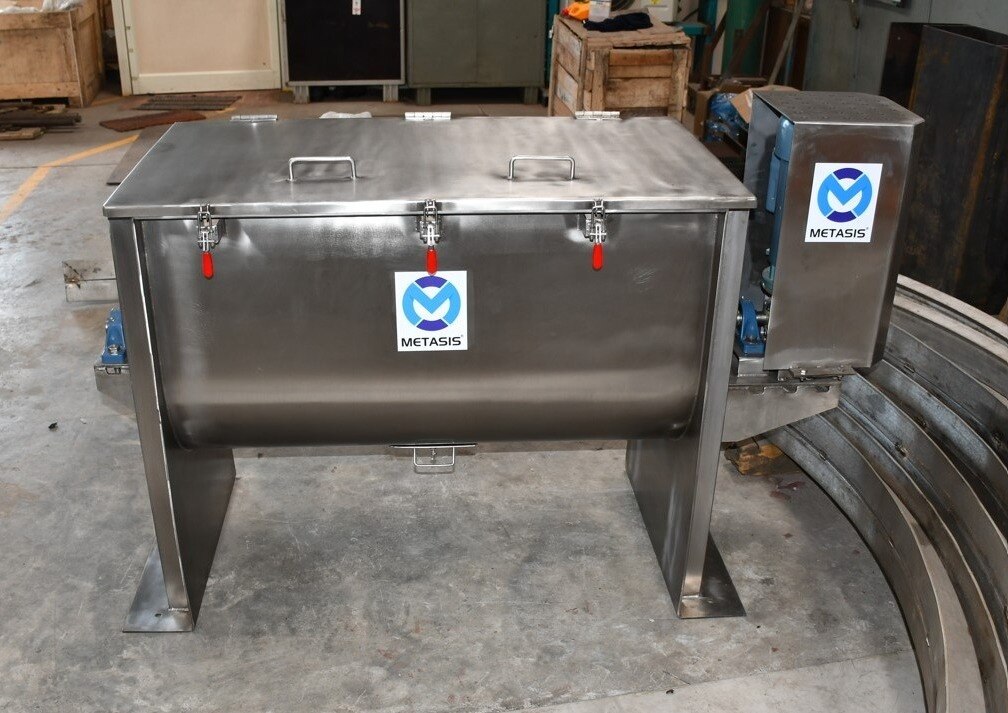
Metasis Equipments Pvt Ltd can help reconcile these checks with the blender’s drawings, operating limits and maintenance records, which is safer than applying generic industrial blender care or ribbon blender maintenance limits.
Related product
 | Ribbon Blender Efficient Powder Mixing Solutions Since 2012, Metasis Equipments Pvt Ltd has been manufacturing high-performance Ribbon Blenders for various... View product → |
Frequently asked questions
What should you inspect before charging powder into a ribbon blender?
Start with the batch record and machine status, then check fill level, ribbons, welds, clearances and visible contamination before charging powder.
Which mechanical defects can affect ribbon blender powder quality?
Inspect for damaged ribbons, cracked welds and incorrect clearances because these defects can create dead zones, segregation or incomplete mixing.
How do you monitor ribbon blender drive and gearbox condition?
Trend motor load, gearbox temperature, bearing temperature, vibration and coupling condition against an established baseline.
What should you check after ribbon blender maintenance?
Verify the discharge gate, shaft seals, changeover condition and cleaning status, then complete a post-maintenance release check before production.