
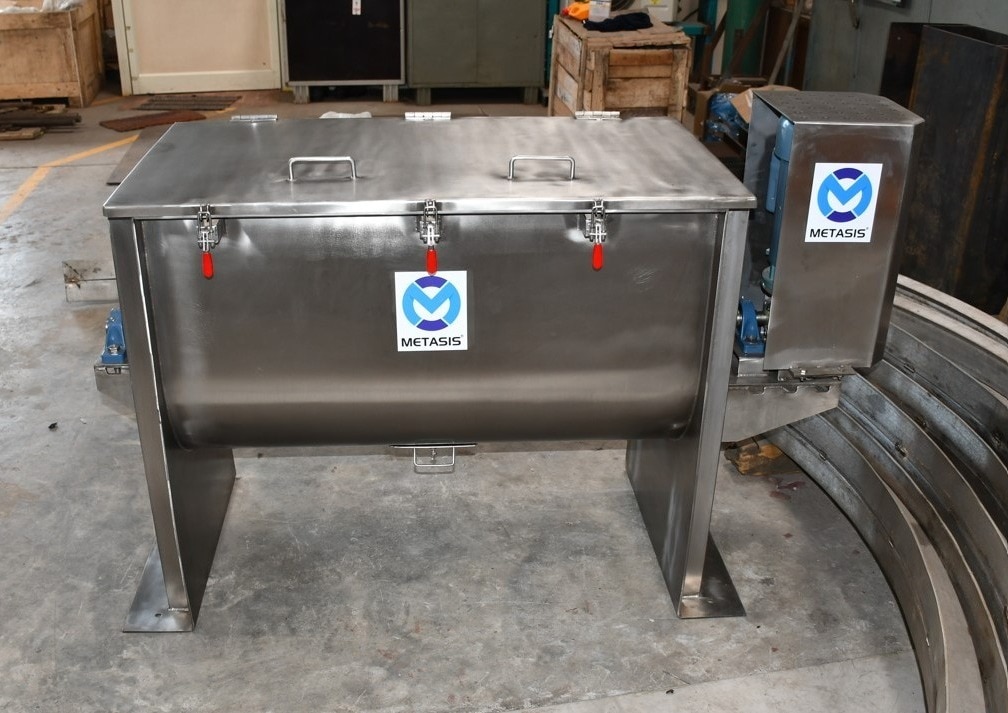
Uneven batches can come from poor circulation inside the trough, incorrect loading, worn flights, feed errors, or segregation during discharge. By checking the process in a fixed order and measuring blend uniformity rather than judging appearance, you can identify whether the fault lies in the recipe, operation, machine, or mixer selection.
Key takeaways
- Check fill level, powder circulation, and ribbon condition before extending cycle time.
- Follow a fixed troubleshooting sequence before changing ribbon blender settings or hardware.
- Sample from multiple locations and discharge stages to prove mixture uniformity.
- Choose different powder mixing equipment when the blender cannot achieve required circulation or discharge control.
Start with fill level, circulation, and ribbon condition
Before extending the mixing cycle, treat ribbon blenders for uneven mixing problems as a loading and mechanical-check issue. A longer run cannot restore circulation that the powder never achieved.
1. Start near 30–70% of gross volume as a practical working range. Establish the actual minimum and maximum through trials for the powder and flight design. Underfilling can strand material near the shaft, trough bottom, or end plates; overfilling removes the free volume needed to cascade around the inner and outer flights.
2. Measure ribbon-to-trough and end-plate clearances against the manufacturer’s design values. Inspect bent flights, worn edges, shaft runout, shaft alignment, loose couplings, loose set screws, and powder buildup in dead zones.
3. Confirm rotation direction. The inner and outer flights move material in opposite axial directions, so reversed shaft rotation can defeat the intended circulation even when the batch appears to move.
4. Check the gearbox for leaks, noise, and abnormal temperature; listen for bearing noise and review lubrication records. Inspect drive alignment before blaming the recipe.
5. Trend motor current or torque against comparable batches. A sudden increase can indicate overfilling, a wet lump, caking, a foreign object, or drive resistance; an unusually low or flat load can indicate underfilling, a broken flight, or weak material engagement.
Only after these checks pass should you test a longer cycle. Current and torque reveal mechanical or loading changes, not blend uniformity.
Use a fixed troubleshooting sequence before changing the machine
Reconcile the batch before touching the blender. Verify recipe percentages and actual batch weights, then compare feeder totals, load-cell readings, hopper levels, and transfer-line records with intended quantities. Bridging, blocked vents, moisture pickup, and inconsistent charging order can mimic ribbon blender mixing problems.
- Check ingredient order: use geometric dilution or premix a minor ingredient with part of the carrier. Add liquid at a controlled rate through distributed sprays, not one point; use the specified post-addition mixing period.
- Confirm shaft rotation direction, speed, fill level, and mixing time. A fixed longer cycle does not prove uniformity. Higher speed can increase dust, heat, attrition, or post-mix segregation.
- Inspect the discharge valve and retained heel. A blocked gate, leaking seal, or stagnant residue can make a good blend appear bad.
Compare the symptom before calling it poor blending:
| Cause | Evidence | Interpretation |
|---|---|---|
| Poor powder flow | Rat-holing, surging, unstable feeder output | Flow problem, not necessarily mixing failure |
| Caking or wet agglomerates | Hard lumps, shaft coating, damp chunks | Liquid rate, moisture pickup, or inadequate post-addition mixing |
| Electrostatic coating | Powder clinging to flights, shaft, or walls | Charge-driven distribution error |
| Segregation | Assay changes from early to late discharge | Particles separated after mixing |
| Motor-current trend | Sudden high load or spikes | Wet lump, foreign object, overfill, bearing or drive fault |
| Motor-current trend | Unusually low or flat load | Underfill, broken flight, or weak material engagement |
Use current and torque trends as alarms, not proof of uniformity. A broken flight, wet lump, foreign object, or bearing fault requires isolation and inspection before another batch.
Prove uniformity with representative samples and discharge checks
Prove uniformity by sampling the three-dimensional bed and the discharge stream, not by inspecting a smooth surface. A written procedure must specify 10 increments, each 50 g, from defined upper, centre, lower, shaft-side, wall-side, and end-plate locations; record the mixing time, combine or test increments as prescribed, and use sealed, labelled containers with gentle handling.
1. Use a validated sampling tool and technique. A thief can preferentially remove or separate fines, while a surface scoop misses material near the shaft and trough bottom. Make the analytical portion at least as large as the practical dose you need to assess; a tiny laboratory sample can hide dose-to-dose variation.
2. Test each location by assay or component concentration. Calculate the mean, range, standard deviation, and coefficient of variation, then compare them with a written acceptance limit established before testing. Colour and visual appearance do not prove uniformity.
3. Sample discharge at timed or mass-based intervals: first, middle, and last portions, with at least three increments per portion. Check whether an uneven bottom gate, partial blockage, preferential flow, leaking seal, retained outlet heel, or buildup on flights and end plates changes composition during emptying.
4. Repeat the test across consecutive batches. If particle size, density, shape, or surface roughness differs, continue discharge-stream sampling after transfer or vibration; a batch uniform inside ribbon blenders can segregate outside them. These checks expose ribbon blender mixing problems that a single end-of-cycle sample conceals.
Decide when the ribbon blender is the wrong powder mixing equipment
Choose different powder mixing equipment when bulk circulation cannot overcome sharply different particle size or bulk density, cohesive or electrostatic powders, strong agglomeration, fragile particles, high liquid loading, heat-sensitive ingredients, or a recipe requiring high-shear dispersion. Persistent lumps, wall coating, or rising motor load confirm that a longer cycle is not the cure.
| Option | Shear and residence-time control | Main trade-offs |
|---|---|---|
| Paddle mixer | Low-to-moderate shear; controllable batch residence | Gentle on fragile particles, handles liquids well, but discharge and cleaning can be slower |
| Ploughshare mixer | Higher shear and strong three-dimensional movement | Good for cohesive powders and liquid distribution; choppers add damage, heat, and cleaning demand |
| Conical screw mixer | Gentle lifting and controlled axial circulation | Low particle damage and effective discharge, but slower cycles and residual heel can complicate cleaning |
| High-shear mixer | Intense local shear; short processing time | Disperses lumps and liquids, but increases heat, attrition, power demand, and scale-up risk |
| Continuous mixer | Residence time set by feed rate and configuration | High throughput, yet feed variation, segregation, and short-circuiting are harder to detect and correct |
| Ribbon blender | Low-to-moderate bulk shear; batch time varies with loading | Simple and economical, but retains powder in the trough and end seals and can discharge unevenly |
A chopper, intensifier bar, pre-screening step, or distributed spray system addresses one limitation; none fixes an unsuitable formulation or severe segregation. Balance batch size against mixing and discharge time, cleaning effort, residual trough product, and material held at end seals.
For scale-up, check fill fraction, vessel diameter, flight pitch, clearance, bulk density, shaft speed, tip speed, and power trends. Do not copy rpm and mixing time from a smaller ribbon blender.
Set acceptance tests and supplier information before making modifications
Before modifying the blender, define the pass criteria, sampling plan, and safety controls; a longer cycle is not proof of uniformity.
1. Isolate electrical power, apply lockout/tagout, depressurise connected conveying or liquid systems, and prevent access to rotating flights before inspection. Record ribbon clearance, flight wear, buildup, shaft condition, and discharge-valve condition during commissioning and each maintenance inspection.
2. Run repeat batches at the intended fill level and recipe. Define bed locations across the three-dimensional load and discharge locations covering first, middle, and last portions; specify increments, sample mass, containers, handling, assay method, and a predefined concentration or coefficient-of-variation limit. Check ingredient recovery, retained heel, cleaning verification, and documented blend-uniformity results.
3. Send the supplier one record containing batch mass; bulk density; particle-size distribution; moisture; recipe percentages; ingredient order; liquid rate and location; mixing time; fill level; shaft speed; motor-current history; sample results; and photographs of buildup or worn flights. Include feeder, transfer, and bagging records when available.
This evidence makes ribbon blender troubleshooting measurable. SCADA, gravimetric dosing, conveying, and bagging can prevent quantity and transfer errors, but they cannot correct poor sampling, an unsuitable recipe, or an incorrectly sized blender.
Metasis Equipments Pvt Ltd can use these records to assess the complete material-handling and mixing arrangement rather than treating powder mixing equipment as an isolated component.
Related product
 | Ribbon Blender Efficient Powder Mixing Solutions Since 2012, Metasis Equipments Pvt Ltd has been manufacturing high-performance Ribbon Blenders for various... View product → |
Frequently asked questions
What should you check first when a ribbon blender leaves an uneven mixture?
Check the fill level, powder circulation, and ribbon condition before increasing mixing time or changing the machine.
What is a practical ribbon blender troubleshooting sequence?
Use a fixed sequence: confirm loading and fill level, inspect ribbon condition and clearances, observe circulation, then review mixing time and discharge behavior.
How do you prove that a ribbon blender mixture is uniform?
Take representative samples from different locations and discharge stages, then compare the test results against your defined acceptance limits.
When is a ribbon blender the wrong powder mixing equipment?
Choose another mixer when the required circulation, segregation control, powder characteristics, or discharge uniformity cannot be achieved within the process limits.